How to make DIY Lolly Bags
Christmas is a wonderful time to bake cookies, make some sweet pies and share delicious, sweet treats with friends. If you’re someone who gets into the Christmas spirit, and loves to give little gifts then you’ll love these easy DIY Lolly Bags. They’re the perfect wrapping for sweet treats or tiny trinkets for friends, colleagues, and perfect for parties as take home lolly bags!
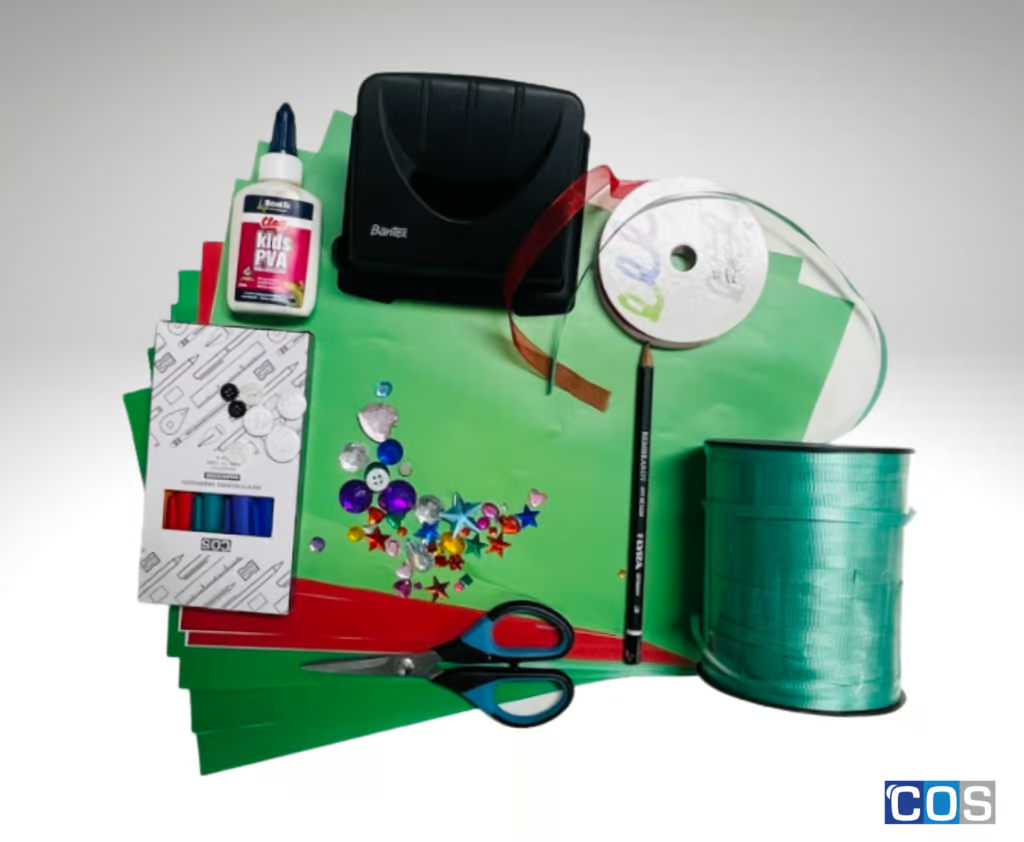
Things you need:
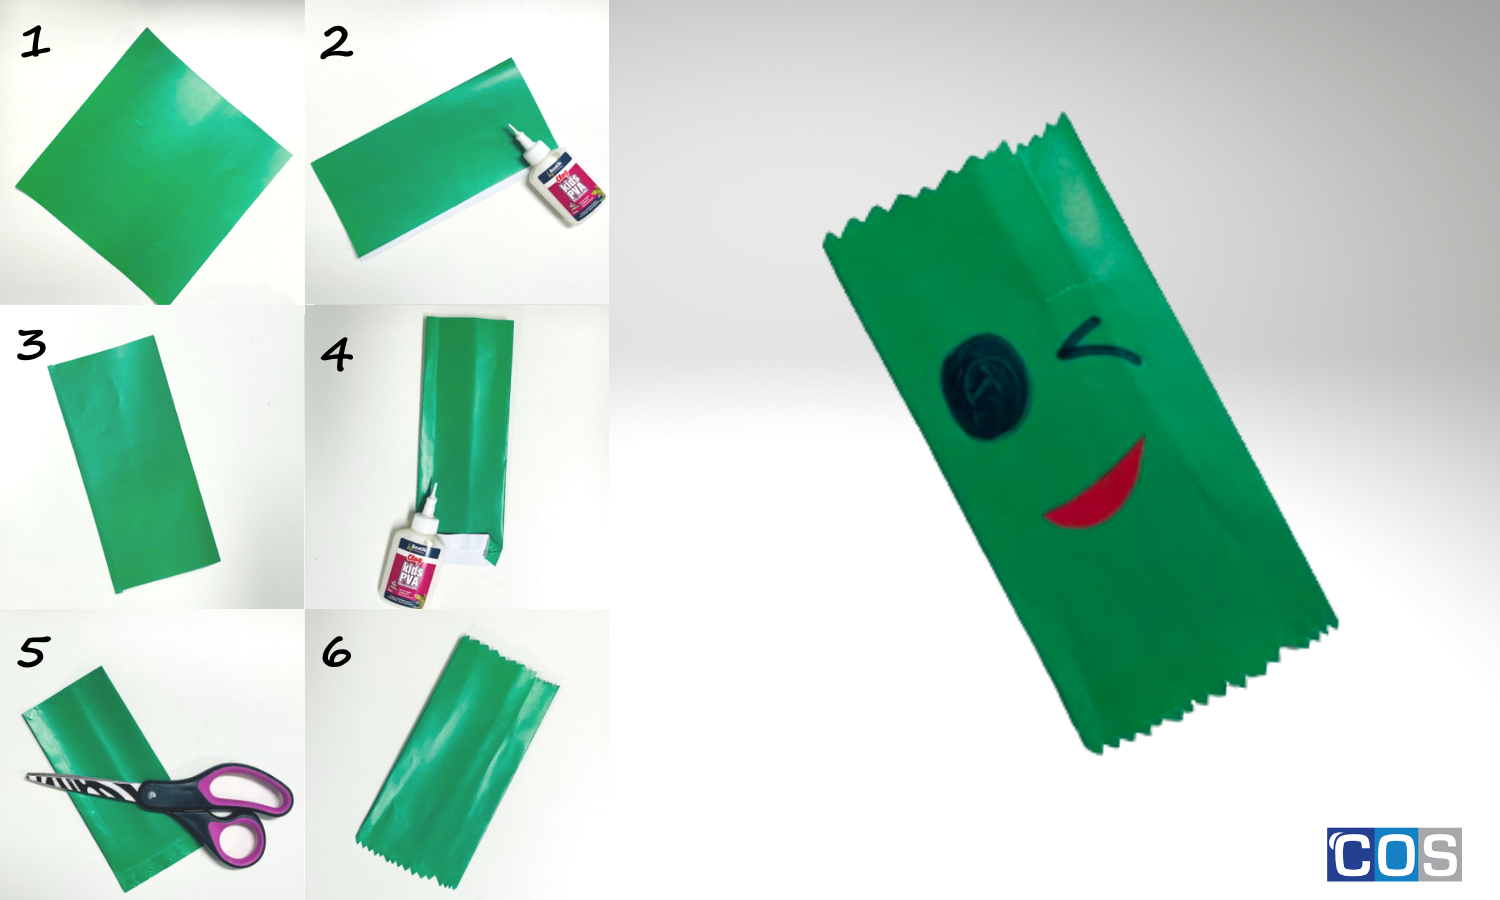
Mini Lolly Bags
Instructions:
- Take a coloured A4 sheet and fold the craft paper in half horizontally, leaving a 1/2 inch margin on one side, as seen below
- Take a glue stick and apply it to the section that is 1/2 inches long
- To make the bottom of the bag fold the short side up about 2 inches
- Take glue and apply on both sides and leave it for some seconds
- Fold the long sides of the bag as shown, matching the corners and this will create crease lines on the sides of the bag
- Take a pencil and create a criss-cross design at the bottom and cut nicely with scissors
- Take a permanent marker and draw whatever smiley or face you want to be on the bag
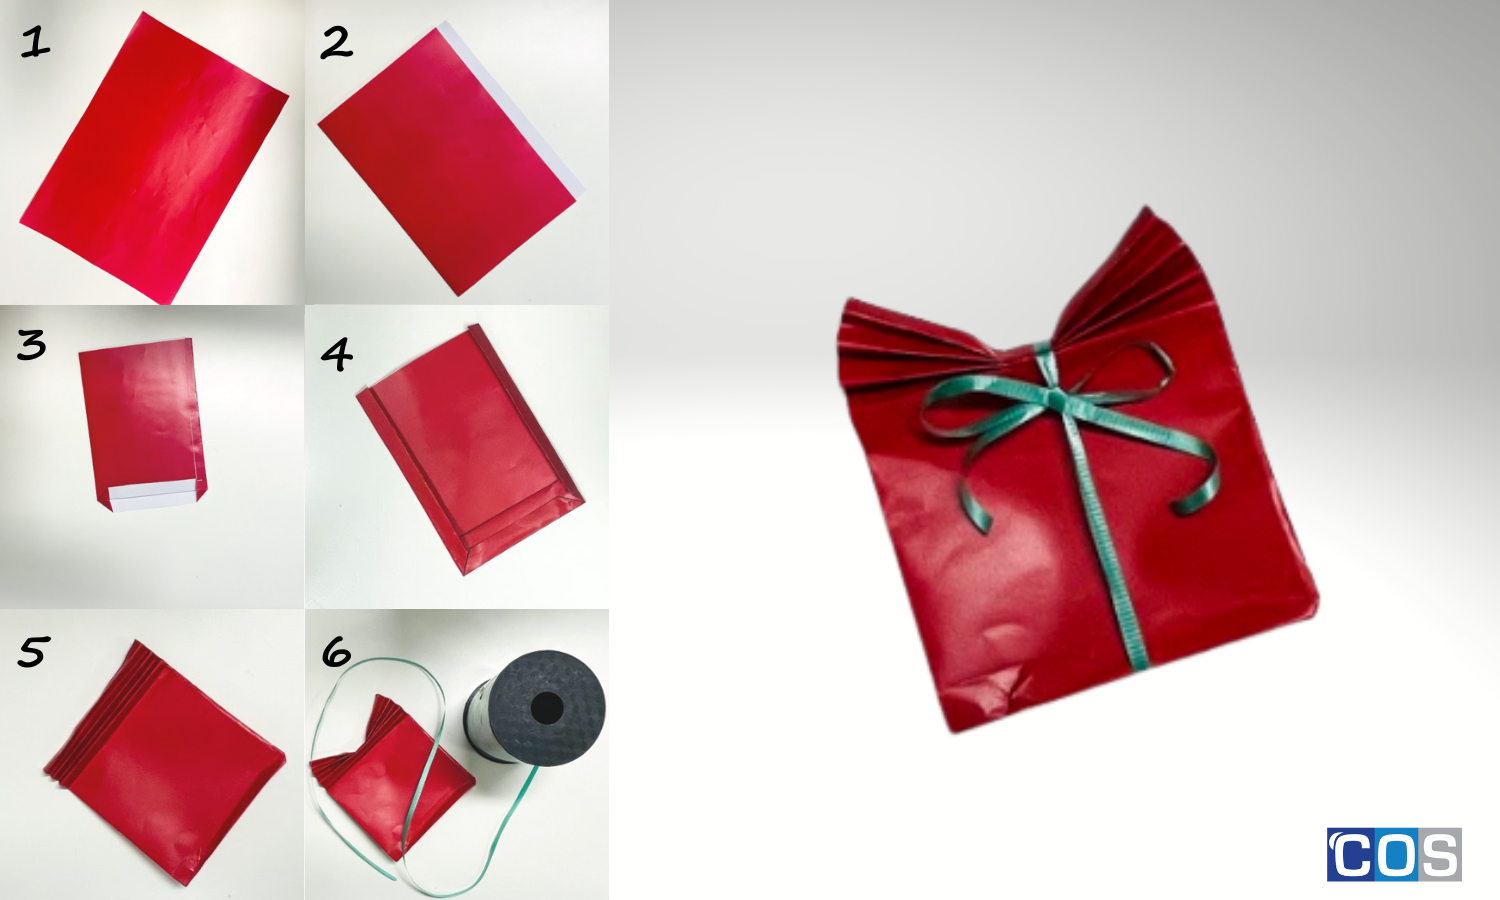
Mini Bow Bags
Instructions:
- Take a coloured A4 sheet and fold the craft paper in half horizontally, leaving a 1/2 inch margin on one side
- Take a glue stick and apply it to the section that is 1/2 inches long
- To make the bottom of the bag fold the short side up about 2 inches
- On a flat surface, re-open your short side fold as shown, one side at a time. This will create a triangular pattern on each side
- Glue the overlapped flaps to secure the bottom of the bag. Take care to glue only the flaps and not the inside of the bag
- Fold the long sides of the bag as shown, matching the corners of those squares. This will create crease lines on the sides of the bag
- From the top start folding the paper bag around 1/2 inches and keep going until you get a nice bow
- Take colourful ribbon and tie it around the middle of the paper bag
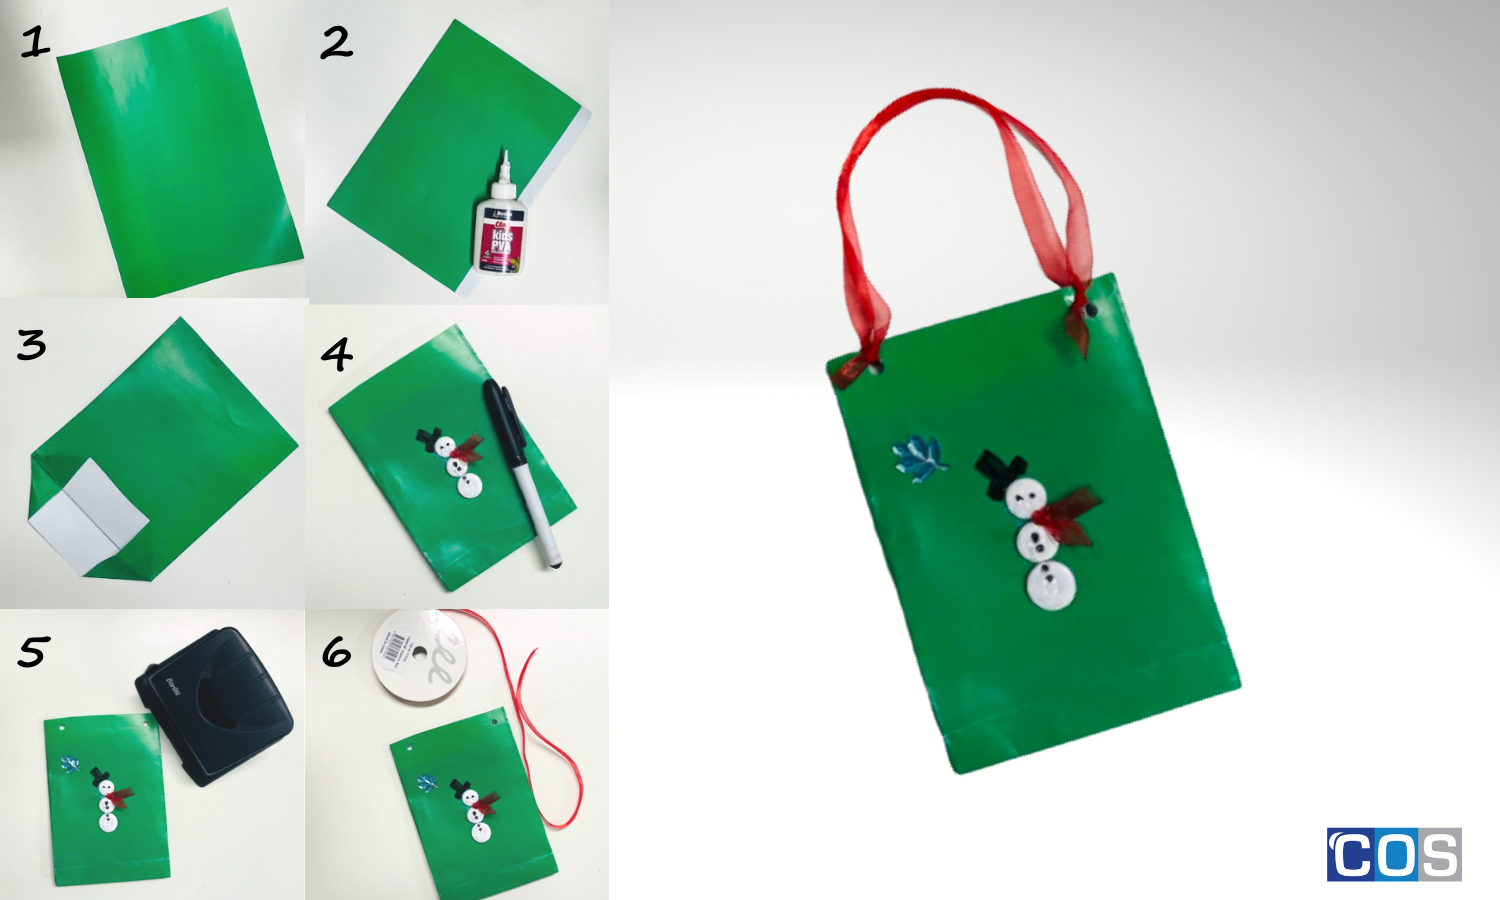
Mini Snowman Bags
Instructions:
- Take a coloured A4 sheet and fold the craft paper in half horizontally, leaving a 1/2 inch margin on one side
- Take a glue stick and apply it to the section that is 1/2 inches long
- Fold the bottom about 2 inches on each side, this will create a triangular pattern
- Glue the overlapped flaps to secure the bottom of the bag
- Fold the long sides of the bag as shown, matching the corners, this will create crease lines on the sides of the bag
- Take 3 buttons and a ribbon and glue them in the middle of the paper bag
- To make a snowman, take a black marker and make eyes and a hat
- Punch a hole on top and make the handle with colourful ribbon
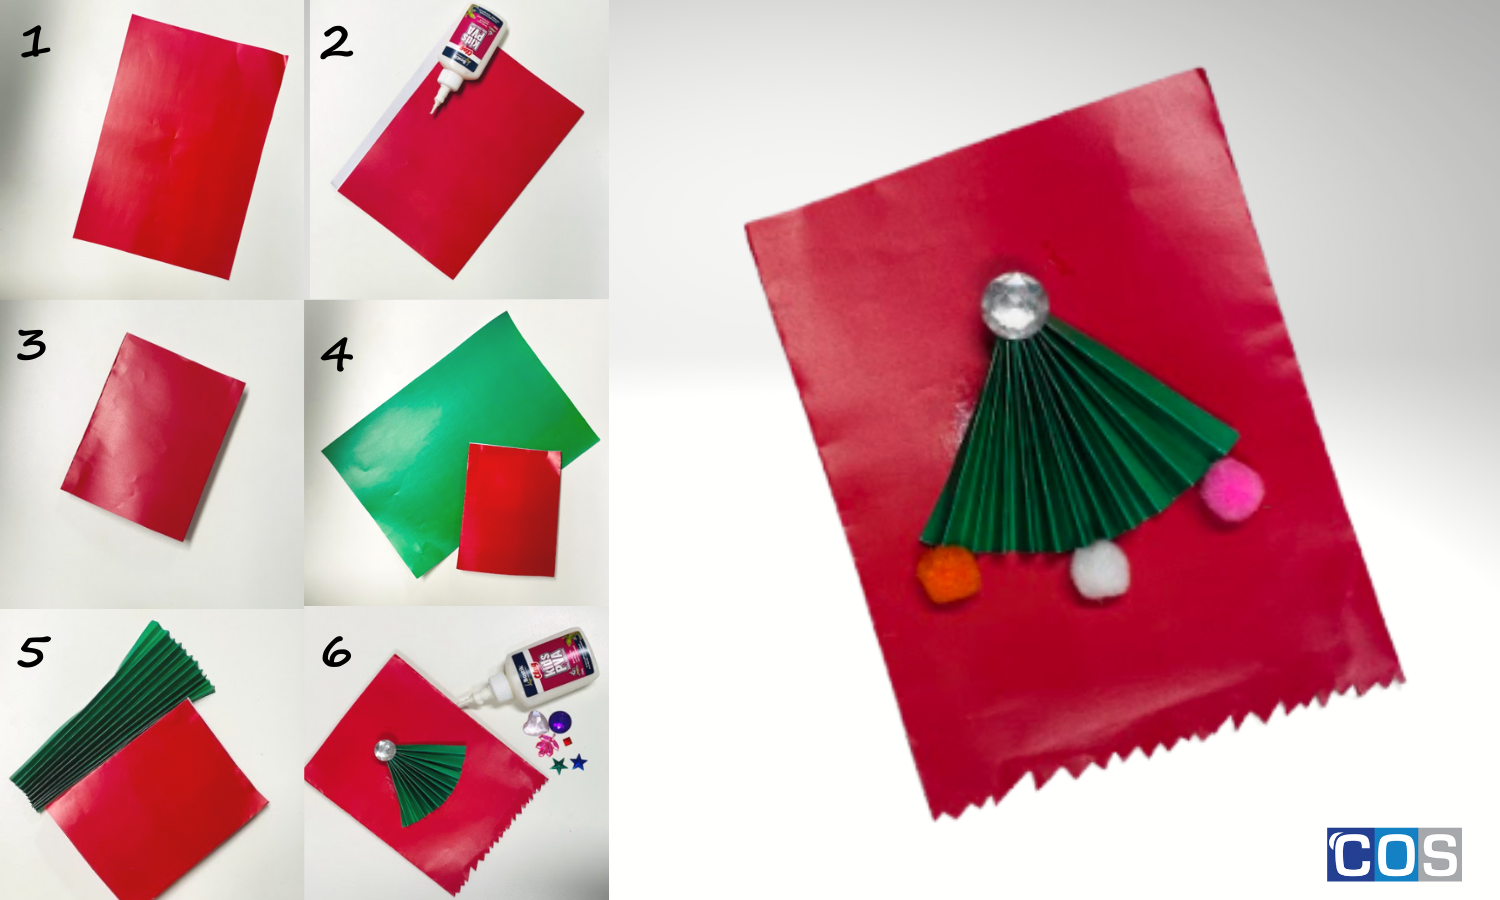
Mini Christmas Tree Bags
Instructions:
- Take a coloured A4 sheet and fold the craft paper in half horizontally, leaving a 1/2 inch margin on one side
- Take a glue stick and apply it to the section that is 1/2 inches long
- To make the bottom of the bag fold the short side up about 2 inches
- Flatten the open parts neatly. This will create 2 open sides, like flaps
- Glue the flaps to secure the bottom of the bag
- Take a green craft paper and fold it 1/2 inches to make it look like a Christmas tree
- Cut it from the middle and secure it with glue
- Glue the Christmas tree in the middle of the paper bag and decorate it with pom-poms or rhinestones
Now that you’ve made your DIY Lolly Bags all you have to do is decide what fun treats to fill them with. They’re perfect for confectionery items like Allen’s Snakes Alive or Jelly Beans!
No products were found with the applied settings

