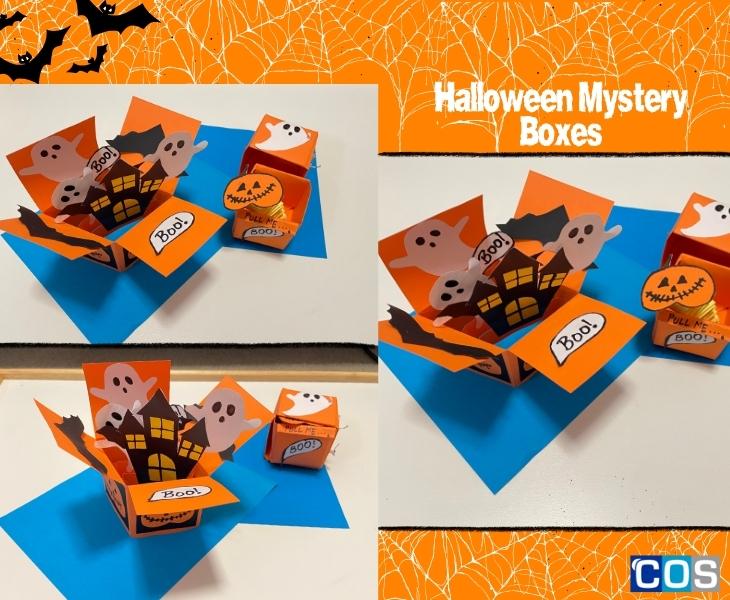
Halloween is a magical and mysterious time filled with imagination, costumes, lollies, and, of course, CRAFTS! This Halloween, engage kids in some DIY Halloween crafts that will not only tap into their creativity but will also help in creating lasting memories. From spooky explosion boxes to pop-up mystery boxes, here are some fantastic DIY crafts that will make this Halloween unforgettable for the little ones.
Gather your scissors, glue, copy paper, or paint – it’s time to embark on a journey of creativity and imagination with our delightful DIY Halloween Crafts for Kids!
Explosion Mystery Box
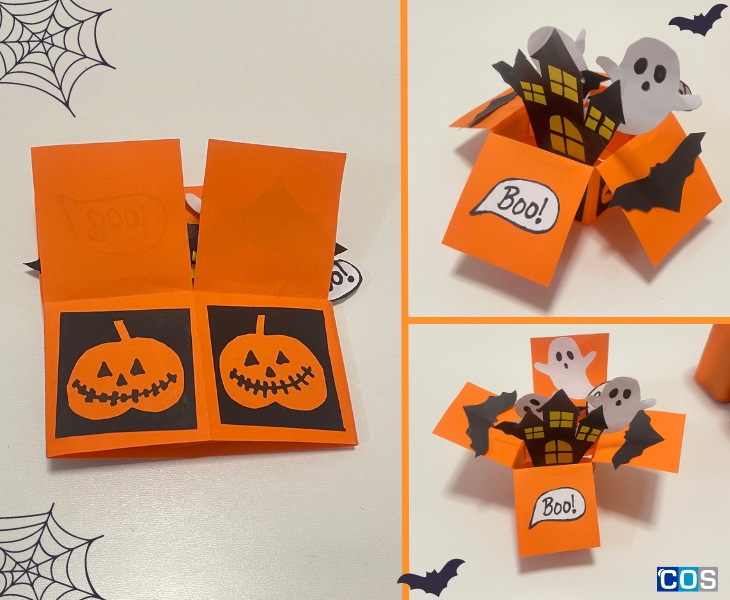
Things you’ll need:
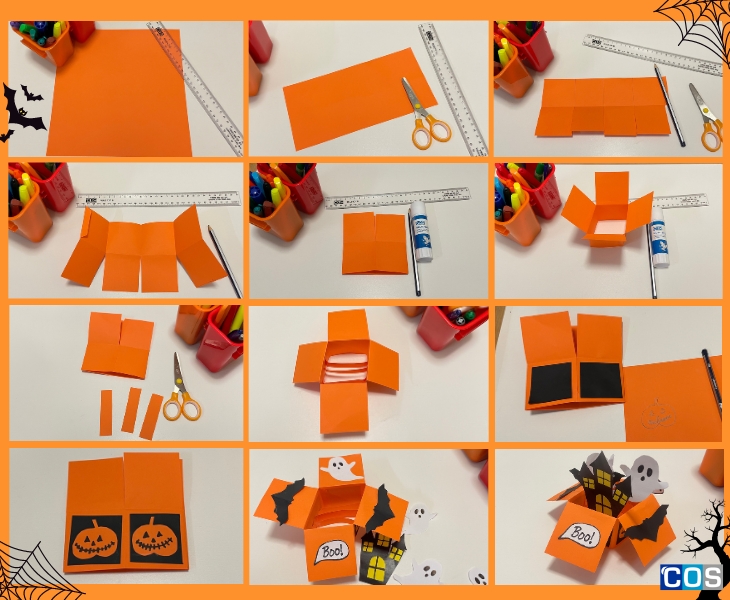
Step-by-step instructions:
- Begin with a piece of coloured copy paper measuring 25cm x 12cm. Fold it evenly in half along its length.
- Next, mark intervals of 6cm along both the top and bottom edges of the 25cm paper. Draw lines across to connect these marked 6cm intervals. After marking, you will be left with a 1cm extra strip of paper, which will be used to stick the box together.
- For the section up to the centreline, draw continuous lines, and for the section after the centreline, make dashes to indicate the cutting area. Carefully cut along the dotted lines from the edges toward the centre, making three cuts in total.
- Using a ruler, neatly fold along the lines to create the shape of the box, and then apply glue to the 1cm strip to seal the box together.
- Now, create three cut-outs, each measuring 8cm x 2cm. Mark 1cm from both ends of each cut-out and carefully fold them at these marks.
- Apply glue to the folded ends of these three cut-outs and securely attach them inside the box.
- Now, cut out four pieces of coloured paper, each measuring 5cm x 5cm, and glue them to the front of the four sides of the box.
- To add decoration inside the box, draw pumpkin faces, ghost faces, haunted house, or spider designs to stick it onto the box.
- Your explosion box is now ready to surprise everyone!
Pop-up Surprise Box
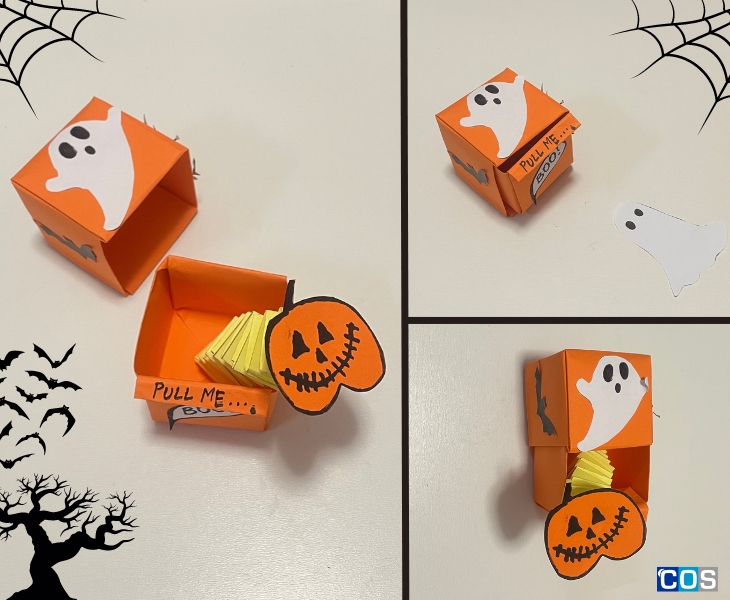
Things you’ll need:
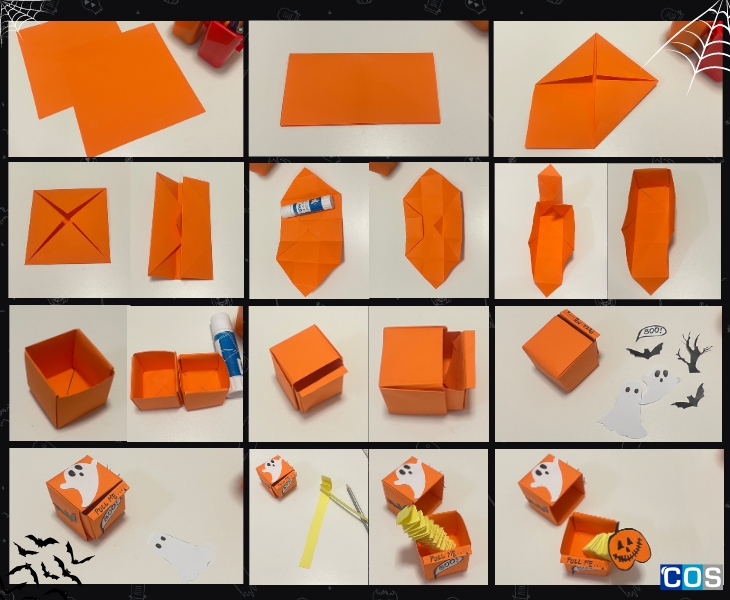
Step-by-step instructions:
1. Take 2 pieces of coloured copy paper, one measuring 21cm x 21cm and the other 20cm x 20cm.
2. Take the 21cm x 21cm copy paper and fold it in half width-wise, ensuring a sharp crease along the fold line. Then, fold it again lengthwise and press firmly to create another crease.
3. Now open the paper and fold it from each corner making a triangle. After this step, fold the paper and divide it into 3 equal portions. Repeat the process on the other side by folding it equally in 3 parts.
4. After this open the copy paper, and you will see 2 folded triangles on both side, stick them in between using glue stick.
5. Now start folding the paper as shown in the image below an stick the corners inside using glue stick.
6. To create the second box using the 20cm x 20cm copy paper, repeat the same steps outlined above. Leave a 1cm strip of paper unglued (as shown in the image) to write your message on, and then glue the rest to form the box.
7. Insert the smaller box into the larger one, making sure the 1cm paper strip with your message remains accessible on the outside.
8. Decorate the outside of the box with drawings of ghost faces, trees, pumpkin faces, bats, or any other spooky designs you prefer.
9. Now, take two paper strips measuring 30cm x 2cm and fold them together to create a paper spring. Attach this paper spring in the centre of the smaller box that goes inside and add a character or decoration to the top of the spring.
10. Close the box, and when you’re ready to surprise your loved ones, hold onto the 1cm paper handle and gently pull the smaller box out, causing the character on the spring to pop up.
11. Enjoy your homemade spooky gift box for some Halloween fun!
