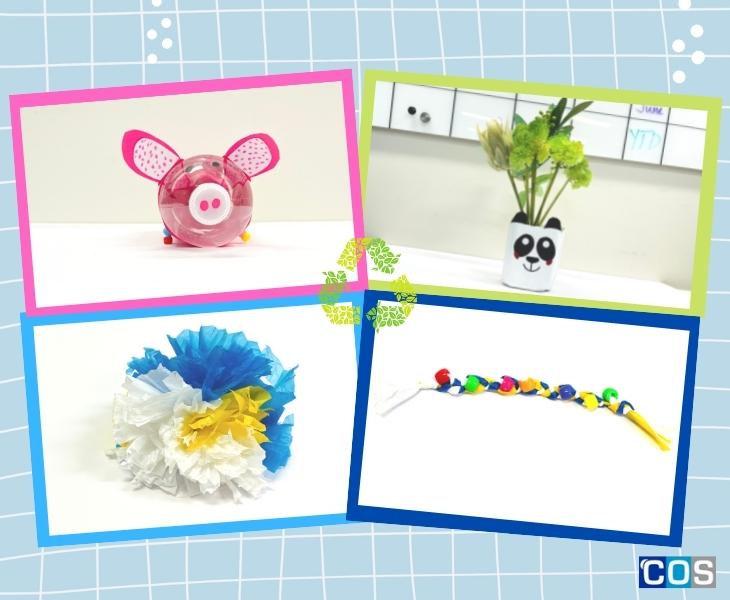
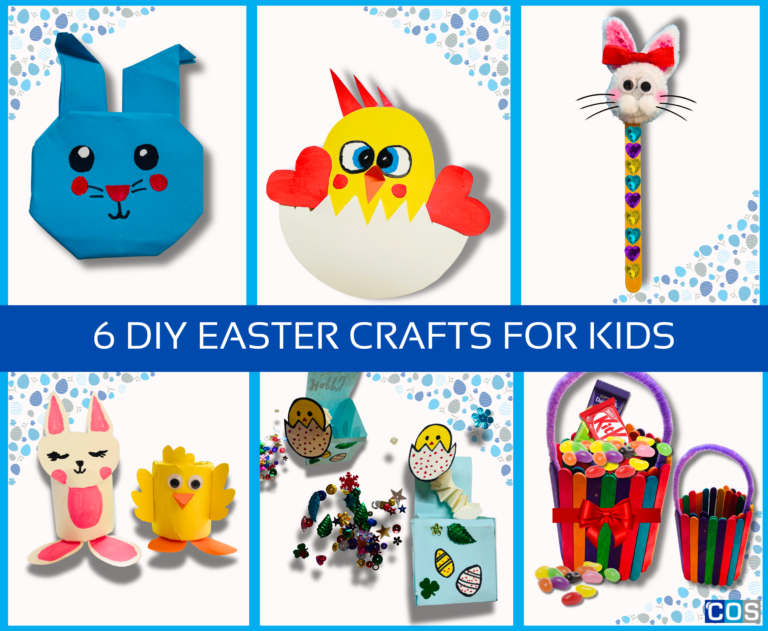
Looking for ways to reduce plastic waste and do your part for the environment? Why not try upcycling your left-over plastic waste and have some fun with our easy DIY projects for kids! Instead of throwing away plastic waste into landfill; you can upcycle plastic into something useful, reducing your environmental impact, and having fun while doing it!
Here are some easy craft projects to turn upcycled plastic waste into useful things like adorable planters, piggy banks, cute bracelets, and more. It’s time to dig into the recyclable bin and gather all your plastic bottles and plastic bags, to create something useful, and do your bit for the environment!
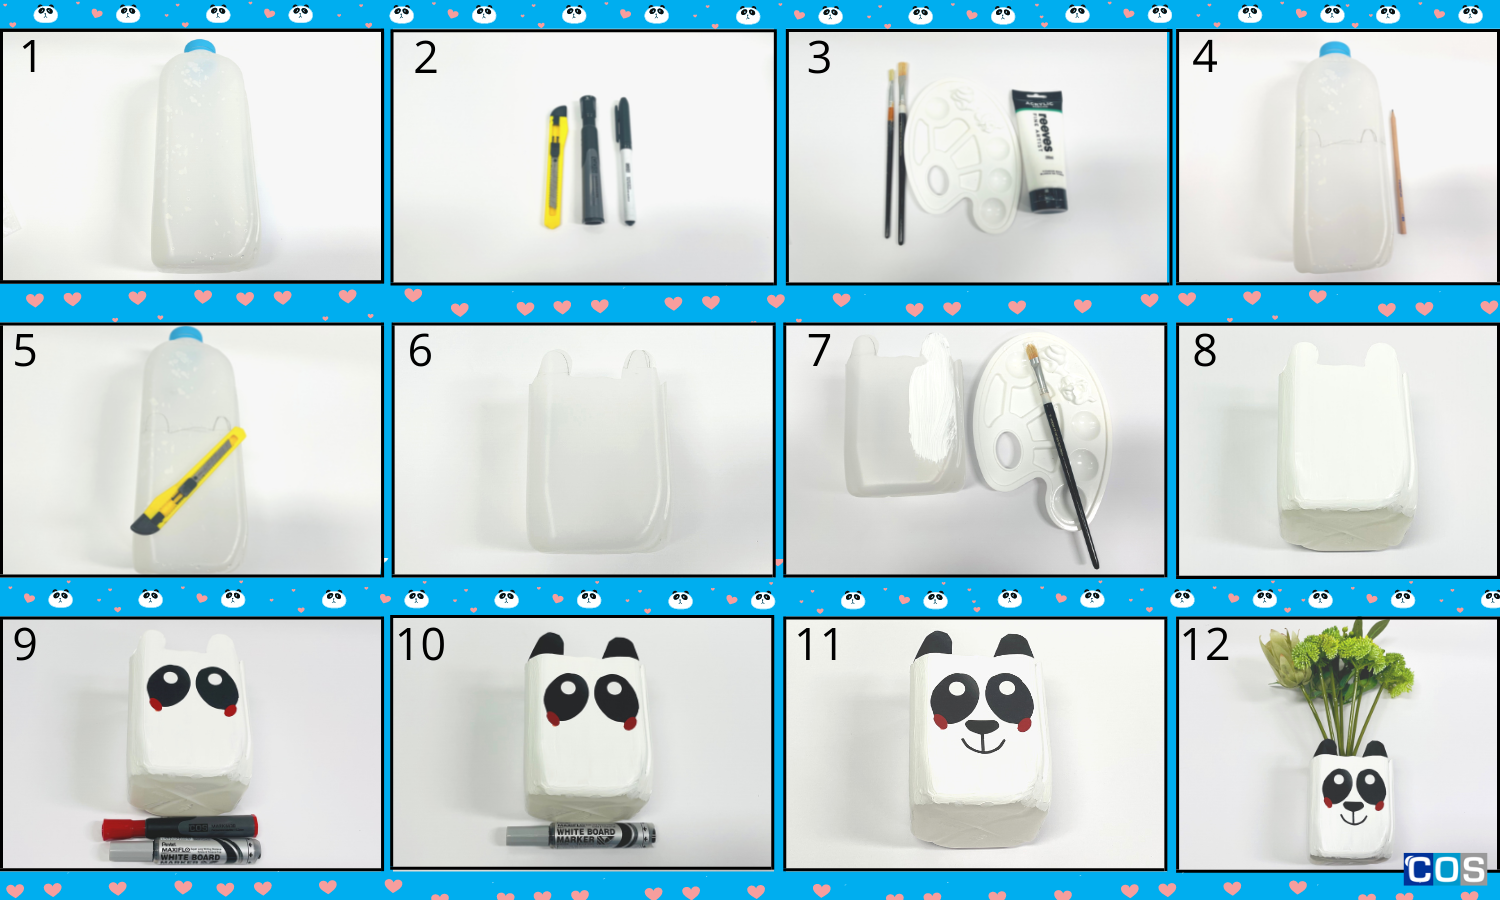
Upcycled Plastic Milk Bottle Panda Planter
What you’ll need:
- Milk bottle or any soda bottle
- Paper cutter
- Acrylic paint – white and brushes
- Permanent markers – black and red
- PVA glue
- Pencil
Instructions:
- Carefully remove the label from the milk bottle or soda bottle, scraping off any sticky residue (Eucalyptus oil is great for removing sticky mess)
- Cut the plastic bottle in half, approximately 1/3 of the way from the bottom with a cutter. Poke a hole at the bottom to allow excess water to drain out
- Take a pencil and draw a panda shape neatly on the bottle
- Use a box cutter to neatly cut out the animal shape
- Use white acrylic to paint the bottle cut-out and give it at least two coats both inside and outside. Let it dry completely!
- Use a permanent marker to trace a panda shape and neatly draw eyes and a nose
- Isn’t it adorable? Now it’s time to put your favourite plant in it and see how it brightens up your space
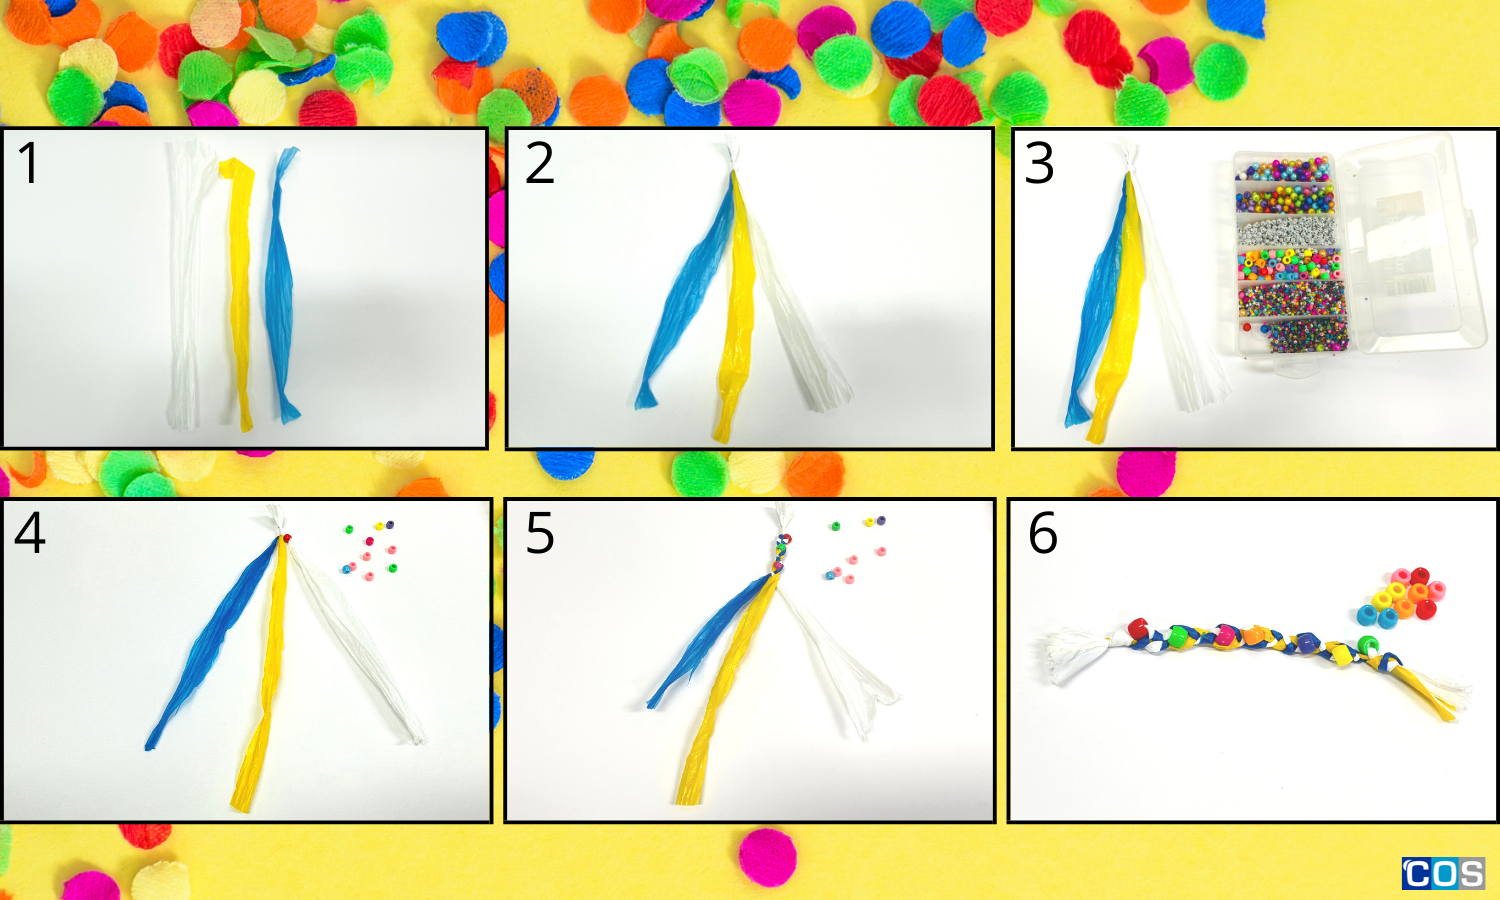
Upcycled Plastic Bag Friendship Bracelet
What you’ll need:
- Colourful plastic bags – 3
- Beads
- Scissors
Instructions:
- Flatten colorful plastic bags and cut across the bottom of the bag into 1.25-inch wide strips. Also, remember to leave 1.25-inches uncut on each side lengthwise for tying the knot
- Now you have three strips of plastic bags, it’s time to take the ends, one from each bag, and knot them together. You will end up with a knot from which three plastic strips extending from it (with beautiful colours)
- To learn how to make adorable bracelets out of plastic bags, you must first learn how to braid or you can learn by following the process. Place the plastic strip on your right over the centre strip Place the left strip over the right strip. The right plastic bag strip should now be on the top of centre strip but below the left piece
- Move the right piece of plastic bag over the left strip. Repeat these two stages until you get the appropriate length braid
- To make it pop-out, add beads in one strip and follow the braiding process
- Once you’re done with braiding and adding beads, leave the end part and make a knot on it leaving the extending plastic pieces
- After that, tie the two ends of the unbraided plastic together, then clip the remaining ends
- Your bracelet is now ready to be gifted to friends or loved ones
Upcycled Plastic Bag Party Pom Poms
What you’ll need:
- Colourful plastic bags
- Ribbon or string
- Small piece of cardboard
- Scissors
Instructions:
- To begin, cut the plastic bags into long strips. Cut the bottom of the bags and cut a 1.5cm wide continuous strip of plastic starting at the bottom
- Cut a 10cm broad piece of cardboard. Wrap your plastic strips tightly around the cardboard to form a thick bundle. You can make your pom-pom small, medium, or large based on the cardboard cut-out
- Now wrap plastic strips around the cardboard piece around 20 times, combining the colours of your choice
- After that remove the strips from the cardboard and bind them together with string in the centre
- Then, take the plastic looped ends carefully
- Puff up the pom-pom and cut the joined plastic pieces from above and trim any longer ends
- Your handmade pom-pom is now ready to be used as a party decoration
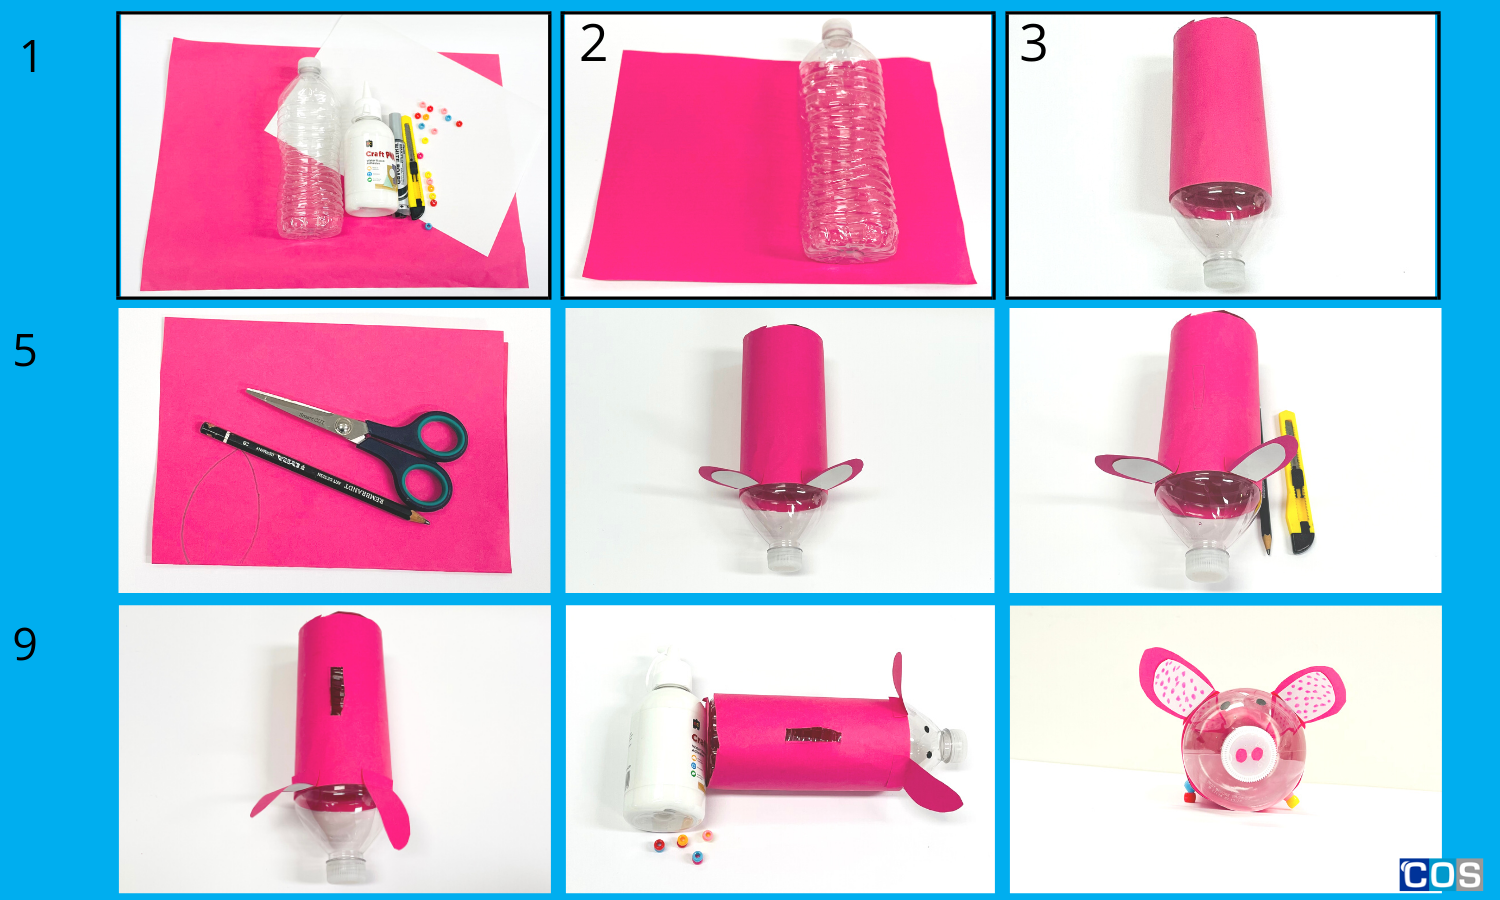
Upcycled Plastic Water Bottle Piggy Bank
What you’ll need:
- Small empty water bottle
- A4 copy paper – colour of your choice
- Small beads
- PVA glue or stick
- Scissors
- Paper cutter
- Permanent marker
Instructions:
- Take a sheet of coloured A4 copy paper and wrap it around the plastic bottle
- Stick it with the help of PVA glue or glue stick and wait until it dries
- Take another sheet of A4 coloured copy paper and cut out 2 little pig ears and cut out 2 more pieces of a different colour – slightly shorter than the previous ear cut-outs
- Glue the ear cut-outs together and stick them on the bottle below the edge of the paper closest to the spout part
- Now it’s time to make an opening for your money. Take a paper cutter and slit about 2 inches long and ½ inch wide in the centre of the bottle
- Flip the bottle over to the bottom side, which is the opposite side of the slit opening. Glue on beads to make the pig’s legs. Spread them out evenly so that the pig stands on the bead legs when you turn it over
- Your piggy bank is all set. Now put some money in it and start saving!
These craft projects are perfect for turning upcycled plastic waste into something useful while also educating kids on the upcycling process.
If your kids are after even more environmentally friendly craft projects, why not try some Easy to Make Zero-Waste Craft Activities for Kids!
No products were found with the applied settings
